

Aehkaj
-
Posts
106 -
Joined
-
Last visited
Content Type
Profiles
Personas
Wiki
Rules
War
Systems
Safety
Player Conduct
Forums
Forms
Posts posted by Aehkaj
-
-
Captain Sir Vladrick var Ruthern would read the missive, nodding in approval "The time has almost come. It's been a good amount of time."
2 -
Captain Sir Vladrick var Ruthern would nod in satisfaction from the missive “That’s what I expect of my brigadiers, to lead us straight to victory.” He would set the missive aside, continuing to work as he prepares to join in the fighting soon “Oren aut Mortem.”
11 -
Sir Vladrick var Ruthern would smile as he reads the treaty "It will be good to see peace continue with others."
3 -
Sir Vladrick var Ruthern would read the missive before morning training "Peace is a good thing, but this rowdy clan wishes to break it for a misunderstanding?" He would shake his head as he fixes his armor and prepares his Partisan "I pray they take this chance to fix their wrong doing, I would rather not have to get used to aiming low."
8 -
Sir Vladrick var Ruthern ignores the rules as he continues standing as still as a statue.
0 -
Spoiler
Report of the Battle of Petra
The Imperial State Army after driving back the Legion of Sothos
The Imperial State Army engaged the Legion of Sothos as they marched down the River Petra. General Erik var Ruthern led and commanded the Imperial Forces at fortifications made in anticipation.
The battle was incredibly bloody, 2,000 Imperial men fought against the savage and brutal forces of the Legion of Sothos. A total of 200 good Orenain men lost their lives today, but for no small reason. The Legion of Sothos had numbers higher than ours, yet Orenian might held fast leading us to victory. No Sothos survived, no Orenain blood wasted.
Lieutenant Arthur Komnenos led the riverside cannon, and the forces along the left flank of the Imperial men. When the Legion charged, he returned the charge against them with Corporal Grant Elmere, Ensign Jon Othaman, Ensign Duncan Vullier, and Recruit James Maelstorm. These men fought valiantly against the bulk of the Sothos Infantry.
Lieutenant Quinn Darkwood led the forest side Imperial forces in the battle, charging with Sergeant Amelia Elenora, Senior Corporal Mika Uialben, Senior Corporal Solomon Obedia, Ensign James Madron, Private Elias Darkwood, Private Adeline de Sarkozy, Cadet Edmund d’Azor. These men and women alike valiantly fought against the Legion’s forces along with the men under Lieutenant Arthur Komnenos, cutting through them to the Centurion of the enemy.
Lieutenant Oliver Raven, Master Sergeant Varlam var Rutherm, Private First Class Samuel Gendik, and Private Odo Gordias led the Cavalry charge on the flank of the legionnaires, most of the men being dismounted leading to on foot combat with the enemy. Thanks to them, the archers of the Legion were halted from attacking the main Imperial State Army force.
Sergeant Primrose Gendik and Private Jared Munnel led the medical force that saved the wounded soldiers of the battle from imminent death along with Senior Corporal Mika Uilaben. It is believed others helped them with applying medical aid at the end of the battle, but those names have been lost in the report.
The main battle was long, beginning with cannon fire on the Legion’s forces. Soon enough the Legion closed in enough with the cavalry charging on their flank, beginning frantic battling. The Infantry forces then charged against the Sothos forces, Lieutenant Quinn Darkwood and Sergeant Amelia Eleanora leading them in this attack as Ensign Duncan Vullier and Corporal Grant Elmere worked to defend the left flank.
Lieutenant Arthur Komnenos took a pilum almost completely through his side fighting off 2 Sothos Legionnaires before being pushed back, Ensign Jon Othaman fighting to defend him. One of the last legionnaires threw their pilum, impaling Lieutenant Arthur Komnenos to the barricades that they had used as shelter in the beginning, but Ensign Jon Othaman saved him from a possible fatal blow.
Sergeant Amelia Eleanora led the charge being the first to engage in combat with the Centurion along with Cadet Edmund d’Azor. This Centurion proved to be a powerful foe, wielding a warhammer. Not too long after this specific fight began, the Centurion delivered a powerful strike to the top of Sergeant Eleanora’s head, almost killing her. She was soon saved by Lieutenant Quinn Darkwood, Ensign James Madron, and Cadet Edmund d’Azor.
This led to the Centurion being pushed back, a bulk of Imperial forces grouping up to attack this hulking enemy. Ensign Duncan Vuiller plunged his blade through the back stomach region of the man, leading to General Erik var Ruthern delivering a killing crossbow shot to his neck, but not before a near fatal blow similar to the one delivered to Sergeant Amelia Elenora was delivered to Private Odo Gordias.
The efforts of these men and women of the Empire have halted the advance of the Legion of Sothos. They have been pushed back, and will most likely not attack the city of Providence and instead will focus on regrouping and weakening our forces. We as the Imperial State Army will not allow this to happen, and we will crush their forces wherever they appear from. Oren aut Mortem.
Signed,
Captain Vladrick var Ruthern
SpoilerSubnote this is just an event post detailing updates in my Legion of Sothos eventline, if you have questions dm me on Discord: PapaAehkaj#6620
Edit: Totaly didnt demote Amelia from Sergeant to Corporal...
14 -
Captain var Ruthern reads over the missive with a shrug "Too bad I was busy with paperwork to be there."
2 -
“Suck it up, butter cup.” Replied a certain Captain on his way to work
8 -
Spoiler
1st Brigade
"The Helena Regulars"
Introduction
1st Brigade Soldiers at the Battle of Outer Arentania, 1821
The 1st Brigade of the Imperial State Army is the widest in terms of Specialization. The 1st Brigade is not only normal infantry, no, it is more than that. It supports all of the other brigades within the Imperial State Army, and it connects them by assigning duties and planning joint training.
The Imperial Infantry is the bulk of the 1st brigade, forming a strong force of footmen greatly needed in any army. The infantry also splits into specializations depending on what a footman prefers to do in a combat situation.
Lieutenant Billets
Taskmaster
The Taskmaster is the Lieutenant billet in charge of planning events for the Imperial State Army. They collaborate with each brigade in order to increase military fellowship, and to give soldiers work to do throughout the week. These events can range from patrols, to gate duty, to going out on a hunt. Effectively, the Taskmaster is in charge of boosting morale and activity within the Imperial State Army.
Drillmaster
The Drillmaster is in charge of regimental wide training, along with planning training for the 1st brigade itself. Drillmaster works between brigades in the regiment to plan mock battles and to ensure each brigade can work together in battle. On a brigade side, the Drillmaster talks to the Quartermaster, Grenade Master, Artillery Master, and Police master to schedule times for respective training. The Drillmaster is also in charge of training the Infantry of the 1st brigade in formations and combat that extends on precious 2nd brigade combat academy training.
Quartermaster
The Quartermaster billet is the backbone of the Imperial State Army’s supply line. The Quartermaster is in charge of organizing storage and keeping adequate supplies ready for use by the Imperial State Army, and managing supplies for projects around the Empire
Navy Master
The Navy Master billet is in charge of the Imperial Navy. It is their job to train crews for ships, and to act as the head of a ship in combat. The Navy Master keeps track of the Imperial Sailors, dictating jobs for them while sailing and while on shore.
Specializations
Grenade Master / Imperial Grenadiers
The Imperial Grenade Master in charge of the Imperial Grenadiers within the 1st brigade. It is expected of the Grenade Master to drill the Grenadiers and to lead them in combat. The Grenade Master is also expected to lead fellow infantry in combat, to coordinate them with the grenadier force. The Imperial Grenadiers are the best of the best of the 1st Brigade infantry. Trained for special operations and countering defensive positions taken by enemies. Grenadiers are to be capable in any situation, able to turn the tide to their favor.
Imperial Grenadier standing guard
Artillery Master / Imperial Gunners
It’s original roots come from the Helena Gunners, historically significant to the Imperial State Army as a whole. The gunners play a heavy role in siege combat and in large scale operations, using cannons and artillery. The Artillery Master is in charge of training new Gunners and leading gunners in combat.
Imperial Gunners firing grapeshot during the Inferi War
Police Master
The Police master is a non lieutenant billet in charge of training the whole Imperial State Army in policing. All soldiers within the army need to know proper techniques and practices while doing civil police work while within the Empire, the Police master simply ensures that all soldiers are trained in this matter.
Penny Master
Penny Master is a specialization that acts as an introduction and training period for a future Quartermaster. They are taken under the wing of the current Quartermaster and trained to help within the storage area of the bastion.
Combat Medics
The Combat Medics of the Imperial State Army are under the 1st brigade. Combat medics are in charge of training medics within the army, and supplying medical aid in the midst of combat. For someone who chooses to avoid fighting at all costs, combat medic can be seen as an option.
Imperial Sailors
The Imperial Sailors make up the men charged with sailing in the name of the Empire. The ships of the Imperial State Army are to be manned by Imperial Sailors, ready for combat at all times. The Imperial Sailors must upkeep the fleet, and create strong crews of men to man the fleet to be capable in Naval operations.
Imperial Engineers
The Imperial Engineers are charged within the first brigade to construct and engineer equipment and fortifications for the Imperial State Army. This specialisation is perfect for one that has a creative mind and a wish to build.
Notable Battle History
Battle of Hangman’s Bridge, 1742
The infantry helped to crash through the enemy lines across the bridge before encircling the leftover Morsgradi and destroying their numbers.
7th Nordling War, 1743
The 1st Brigade led the charge against the remnants of the AIS under the command of General Darius Sabari, halting the advance of the besieging forces bound for the Haeseni city of Reza. During a thunderous downhill charge, the enemy forces were shattered and routed instantly.
Chelovek Rebellion, 1750
Following a string of terrorist attacks on the city of Helena, a radicalized group of racial supremacists and anti-Imperial guerilla agents took to the streets committing violence. The 1st Brigade was dispatched immediately by Captain Alren DeNurem, crushing the rebellion through controlled engagements and strategic maneuvering. All members of the Chelovek revolutionary force were executed for treason following the conclusion of the urban battle.
The Battle of Rubern, 1756
The Imperial Infantry during the battle of Rubern made the bulk of the force that crashed into the enemy force, working with the rest of the Imperial Cavalry forces to quickly slaughter them.
Battle of Boomhill, 1766
After several comrades in the Brotherhood of St. Karl were slaughtered by psychotic extremists who had commandeered an abandoned fortification in the Eastern edge of the Empire, the 1st Brigade rallied with its sister Brigades against the threat. In a flawlessly executed maneuver under the command of Colonel Alren DeNurem, the fortress built atop a volatite mine was captured with all radicalized inhabitants removed. This victory brought a boon of valuable resources into the Imperial stores, resulting in the eventual discovery of cannonry.
Scyfling War, 1773
During an engagement by the Haense Royal Army against a band of Schyfling invaders, the 1st Brigade rallied to call for aid of their Haeseni comrades. In a daring effort, the Imperial forces scaled the walls of an overrun besieged keep, rescuing a dozen comrades from the Hounds of Johnstown trapped inside waiting to be slaughtered by the barbarian force. They then covered the evacuation of the wounded, committing its robust medical corps to perform life saving medicine on a number of important Haeseni leaders and footmen alike.
Merryweather War, 1780
Following a series of victorious skirmishes, the Imperial forces pushed the coalition members defending the murderous Sutican King to the Southernmost expanse of the Empire. It was here the 1st Brigade along with the entire might of the Holy Orenien Empire did battle against an overwhelming enemy. The initial charge broke the momentum of the enemy forces, resulting in the immediate call for a white peace.
First contact skirmish, 1778
After responding to a call for aid by the Al’Faiz of Korvassa, the 1st and 3rd brigades under the command of General Alren DeNurem encountered some of the first titan class demons of the Inferi. Having been ambushed, the 1st Brigade held the line while the rest of the scouting force regrouped. The combat experience gained from this event helped pave the way for future engagements with the Inferi.
Cultist uprising of Helena, 1779
At the start of the Inferi invasion, cultist activity across the continent spiked heavily as many were overcome with either psychic enthrallment or hysteria for the apocalypse. In the city of Helena, a great miasmic creature erupted from the ground in the industrial district, as well as a number of summoned demons spewing malflame began to overrun the streets. The 1st brigade responded immediately to the scene with members of the 4th brigade, corralling the chaos to only one district. After an intense skirmish with unknown threats, the creature was destroyed using firebombs crafted by Lt John Pruvia.
Operation Sandworm/Evacuation of Al’faiz, 1780
As the Inferi forces encircled the capital of the Al’Faiz, a daring evacuation effort was undertaken by the Imperial State Army. With the aid of the Haense Royal Army and various volunteer forces, the advancing Inferi horde was held back long enough for the civilian population of the city to be loaded onto ships and evacuated to safety. When the Inferi eventually overran the city, General Alren DeNurem positioned his soldiers along a ridgeline that had been rigged with explosives. There they mowed down the Inferi ground forces with barrages of arrows, retreating down the ridgeline at the last moment, before detonating the hillside which slew a countless number of enemy soldiers. The efforts of the ISA ensured the future survival of the people of Al’Faiz.
Operation Oliphaunt/Siege of Vira’ker, 1784
In a surprise movement, the Inferi under the command of the Beastmaster advanced their colossal Oliphaunts and captured the once Dark Elf home now turned bandit fortress of Vira’ker. This was the first and last time the Inferi were able to make landfall on the mainland outside of the Korvassan plan. The Imperial State Army in a multinational effort with the Dwarves and the Kingdom of Norland, coordinated by General Alren DeNurem, marched upon the fortress. In a series of calculated maneuvers, 80% of the Beastmasters forces were destroyed, using an overwhelming arsenal of siege weaponry. As well, the keep of Vira’ker was destroyed, removing the Inferi foothold permanently.
Operation Shattered Bulwark/Siege of Vitenna, 1787
After severely weakening the Beastermasters forces at Vira’ker, the Imperial State Army with its coalition allies pressed an attack on the Inferi generals stronghold- the previous city of Vitenna. The Imperial State Army was the first to storm the breach into the city, fighting street by street to the main palace. Although, despite slaying countless inferi fighters and demons, the Inferi collapsed the palace on top of the invading forces- resulting in a pyrrhic stalemate. The Imperial State Army was forced to call off the attack and cover the escape of their allies retreating from within the city.
Operation Thunderous Shield/Defense of Aegrothond, 1789
In a massive attack by the Inferi not seen since the fall of Al’Faiz, the capital of Aegrothond was put under siege by nearly every division of the Inferi forces. The Imperial State Army manned the Eastern flank of the city, setting up 15 newly forged cannons. During the siege of the city, forces belonging to the Inferi General Tichar attempted to infiltrate the city- burning the forest as they approached. The stalwart soldiers of the ISA promptly mowed them all down with an unyielding barrage of cannon fire, preventing all enemies on their flank from entering the city. When fighting erupted along other flanks, the 1st Brigade was dispatched to reinforce faltering lines and prevent civilian casualties.
Operation Fall Scorpion/Siege of Al’faiz, 1790
After the Inferi were defeated in Aegrothond, the coalition forces immediately pressed an attack on the fallen city of Al’Faiz which was being used as a staging ground for future invasions. The Imperial State Army manning the Imperial Flagship with its 48 cannons completely destroyed the front gate and walls of the city, cracking open the demon fortress for the coalition ground forces to retake the city. The shock and awe rendered by the innumerable cannon shots caused the enemy to rout, throwing themselves from the walls at the back of the city to flee.
Final Siege of the Inferi Portal, 1792
Under the command of Lt Colonel Peter d’Arkent, the Imperial State Army joined the final siege of the Inferi portal with the rest of the descendant races. Despite an overwhelming opposition force, the total employment of titan class demons, and the appearance of otherworldly beings at the event horizon of the portal, the soldiers of the Imperial State Army did not waver. Although many lost their lives in the apocalyptic event, the Inferi were soundly defeated, saving the lives of countless souls. However, the victory established the integrity of the Korvassan plain, causing a mass retreat as the ground began to implode. Several ISA soldiers extracted wounded combatants of all nations to safety.
The Battle of Southbridge, 1811
Captain Erik var Ruthern led the Imperial Infantry of the 1st Brigade to chase down and slaughter the Sedanites during the battle. The infantry crushed the rebels, ending the battle with no Orenian casualties.
The Battle of Robert’s Folly, 1812
Rebel forces were spotted lurking around in providence, leading to a rally in Imperial force. The rebels attempted to lead the Imperials into a trap in the streets of providence, but the Imperial State Army held its ground. The rebels were forced to fight, and against the overwhelming numbers of Imperial soldiers they were defeated.
Battle of Redenford, 1818
Erik var Ruthern, former captain of the 1st brigade, led the Imperial state army infantry into Redenford. After extensive fighting, the first brigade made up most of the fighting, soon routing the Red-hoods from the town.
Operation Golden Field, 1818
The 1st brigade, led by Erik var Ruthern and Anastasia O’Rourke, Used boats to head up the river into Elysium. Soon after, they spotted the Duke of Elysium and attacked. Imperial forces then took the Duke of Elysium captive, bringing him back into Providence marking a major victory in the 10th Norlandic war.
The Offensive of Varhelm, 1819
Infantry forces led by Erik var Ruthern pushed back Nordling forces into Elysium, eliminating their rear guard. Once Nordling forces made it back into their city, Orenian forces pulled out.
The Battle of Peter’s Bridge, 1819
Ferrymen forces attempted to battle Imperial forces on the Providence bridge to avoid being overrun. There was a constant cycle of charges until the Ferrymen forces were routed by the Imperials.
Operation Maiden’s Rescue, 1819
A battle broke out soon after Norlandic forces captured a Lady of d’Arkent. Imperial forces used the fortification of Southbridge as a hold before pushing the Norlandic forces past the Abbey of St. Robert before reaching providence. Then the infantry forces split, flanking the Norlandic forces and defeating them.
The Battle of Providence, 1821
Captain Erik var Ruthern led the first brigade, which made the bulk of the Imperial forces. The battle started with the Ferrymen on the roof of the bank in providence, shooting down at military personnel and civilians. Eventually, the Imperials moved into the Bastion inside of providence, followed by the Ferrymen who dropped from the rooftops to attack. The Imperial forces held strong and demolished the Ferrymen soon after.
The Battle of Outer Arentania, 1821
The final battle of the Tenth Nordling War, the Imperial Infantry made the bulk of the force splitting into two parts. The nordlings crashed into the flanking force leading to the main bulk of infantry slamming into their back, winning the battle quickly.
Signed,
Captain Vladrick var Ruthern
19 -
MC Name:
Aehkaj
Character's Name:
Vladrick var Ruthern
Character's Age:
53
What feat(s) will you be learning?
Alchemy
Teacher's MC Name:
Bawggie
Teacher's RP Name:
Doctor John Pruvia
Do you agree to keep Story updated on the status of your feat app?:
Yes
Have you applied for this feat on this character before, and had it denied? If so, link the app:
No
Are you aware that if this feat is undergoing an activity trial and fails said trial, that you will lose the feat? And that if it is apart of the Lore Games, it might drastically change soon?:
Yes
1 -
Vladrick var Ruthern would simple shrug, as his own son never talked to him about anything. "Guess he is free to be and act how he wants."
2 -
Captain var Ruthern would clean and polish his long saber, ready to act in the defense of his Imperial Elven comrades
5 -
"Bunch of flagellants those cavaliers." Captain var Ruthern would chuckle to himself "Good soldiers though."
4 -
Spoiler
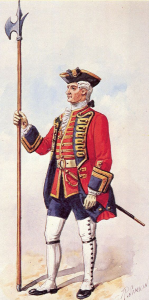
Sothos Legionnaire after the battle of Kositz, 1841
March of the River Anne
The sounds of boots of thousands of infantry echo down the River Anne, at dawn after the Battle of Kositz. The Legionnaires think of their glorious victory, driving back the Imperial State Army to their homes in the city Providence.
But safe they will not be for long, we march for Provvidenza. This “Empire” has lost its way, too busy acting socially while ignoring its country side. A true Empire conquers, we will show them a true military.
As the Legion marches, orders are constantly barked for the men to be collecting wood, gathering rations. In the nights they drill and prepare their armor and weaponry as riders are sent ahead.
On the eve of the third day of marching, sounds of hooves hitting ground sounded from outside of the Legion’s camp. Legates Quintus had arrived, his trained ranks of horseman with him prepared for war.
The war tent soon blew up in conversation. Centurion Augustus, a hero of battle from Kositz, began explaining the plan that they currently had to effectively siege their target. It was then decided, scouting must take place to find optimal positions to breach the city. Supply lines must be cut and maintained. By the next morning they once again marched on.
Our losses make us stronger
Our pilum pierce steel
Our gladius dig deep
Our arrows fly true
Our formation never falters
And neither shall we
Gloria a Sothos
SpoilerThis is a post for a player run event line by myself. Thank you to anyone who had participated in prior events, and I hope more people come around for future events! If anyone wants to interact with the event, message me on discord: PapaAehkaj#6620
10 -
VOTED.
RP Name: Vladrick var Ruthern
MC Name: Aehkaj
Voted: Yes
0 -
Vladrick var Ruthern sharpens his icicle
2 -
“It’s good to see the basilica back again.” Vladrick var Ruthern would comment, seeing the structure “For a valiant heart, nothing is impossible. Oren will rise as fast as our enemies can knock us down, for we are valiant in heart and in action. Oren aut mortem, Godan is with us.”
2 -
Captain Vladrick var Ruthern would shrug "Waste of skin."
2 -
Vladrick var Ruthern would read through the missive, setting it aside and sharpening his halberd (which is for sale by the way just saying)
4 -
Captain Vladrick var Ruthern would have a wide smile as he prepares for his daughter's wedding day
3 -
grnappa2 is the obvious choice
2 -
Captain Vladrick var Ruthern would prepare his spear for battle. "Another rebellion to be put down in due time."
4 -
Vladrick var Ruthern would simply toss the missive aside, moving on with his stack of paper work. "Waste of time."
2 -
RP Name: Vladrick var Ruthern
MC Name: Aehkaj
Voted: Yes
0


The Slaughter at Ephesius
in Provinces and Territories
Posted
"Oren aut mortem." Sir Vladrick var Ruthern would yell, annoyed with his broken forearm