Hello Everyone, with the map finally launched, there is finally the time to write out a post on how it was made, and some of our key map design philosophies we went with on this one.
Disclaimer: for purposes of this post “we” refers to the conclusions reached from map-dev discourse, it does not cover the full discussions and the opinions therein but only generalizes the main arguments that formulated the implemented design.
Design Philosophy
Buildable terrain
Perhaps one of the first issues identified with Aevos in the 10.0 discussions was the poor building terrain. Aevos mountains had large portions of approximately 45 degree angle slopes, which are both terrible for building but also not as imposing or useful for digging into as steeper cliffs. They were also placed oddly, not always forming proper valleys and disturbed the flow of terrain and the roads that would later have to be jammed through them.
As a result the terrain of the map was made to HEAVILY favour settlement building. You can see through the amount of plateaus that were made, and the steep angles and thin shadow the mountains cast (obviously this is a bit unrealistic but a small price to pay). You’ll notice then that the most difficult to build in terrain features or biome types were also limited in number and size or cut out entirely.
Biomes
I won’t detail exactly how each biome was decided on and made for brevity, but generally our major concern coming from Aevos biomes had to due with an overload of generally undesirable biomes (even if settled in) such as a large jungle, a massive snowy zone, and the weird giant mushroom fantasy lag machine biome.
As a result most larger biomes were made to be temperate, but also themed in such a way that they still provided variety. This produced the Mediterranean/Southern Shore, Western Plains/Forest, Black Forest, Highlands, and Taiga biomes.
The more unique biomes were kept to a smaller amount and size in most cases, anticipating that while appreciated for their appearance, they would not be heavily settled. (this assumption turned out to be quite accurate!)
**The exceptions to this were Eternal Autumn which was expanded past the island due to its anticipated popularity, and Zion which was left to fill out a sizable portion since most of it is out of the way (and we really liked it.)**
Thus we consolidated our more fantastical/exotic biomes into what we have now: Pink Azalea, Goldleaf, Geyserlands/Hotsprings, Volcano, Silverwoods, Azure woods, Crimson Forest/Blisterwoods, and Storm Island.
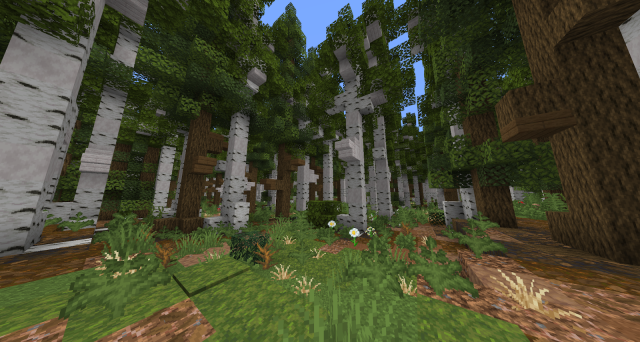
Forests
Another complaint we had was how Aevos forests/woods were often too sparse, and tree assets felt out of scale with the player and often were too airy and had floating blocks. We also determined that if we kept everything too plains-like, there would be few forests and players can always cut them down.
As a result many of the untouched lands are quite forested, and the forests have considerable density to feel like actual forests. The tree assets were made with player scale in mind, made to feel fluffy and full rather than too airy or dense, and not utilizing abstract blocks like glass, grass or trapdoors.
Great concern was put into which tree assets made it into each biome, with some having more complex arrangements such as groves of birch/aspen trees or different tree types in the denser woodlands vs plains (most noticeable in the western plains/forest).
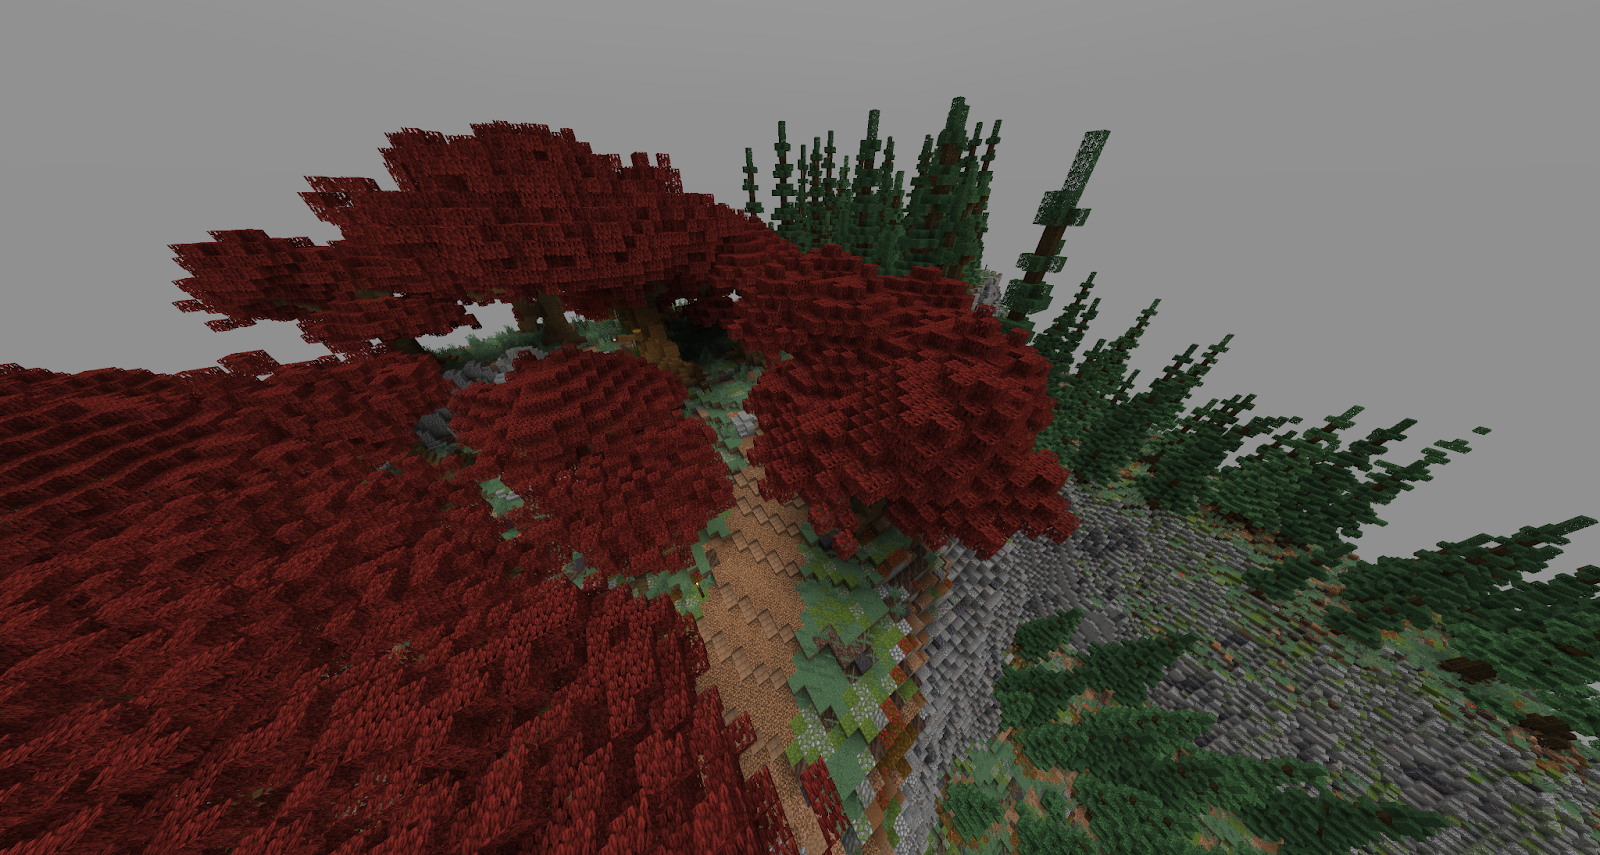
Regarding Redwoods
Mountains
One of the proverbial hills I was willing to die on was the need for the different tiers of an alpine biome. For mapdev sakes we ensured that mountains had their own biomes painted on so that lower portions were covered in Douglas Firs + other conifers and the upper limits were snow-capped. In addition to better imitating nature, it had the benefit of framing the biomes in the valleys beautifully (although it is often hard to see with the render distance cap).
Rivers
A big headache during the Aevos launch was how messed up and nonsensical the rivers were. This map with @Fishy as our river expert we made sure that they followed realistic paths and tried our best to obey fluid physics. The main details are that rivers do not split (except to make river islands or in deltas, which is a bit different since it converges with water later) and also that they don’t flow uphill, in circles, or come from nowhere with no source. This attempt for realism actually took up a big portion of pre-anouncement terraforming, and almost put me on watch.
Originally we wanted to ensure the larger rivers were traversable by larger boats so that the flow of traffic was centered around the inland sea. However the scale on paper did not line up as intended on the paint, which we found out later when using worldedit to make the rivers that ultimately could not be the intended width without being comically out of proportion with the terrain (we tried).
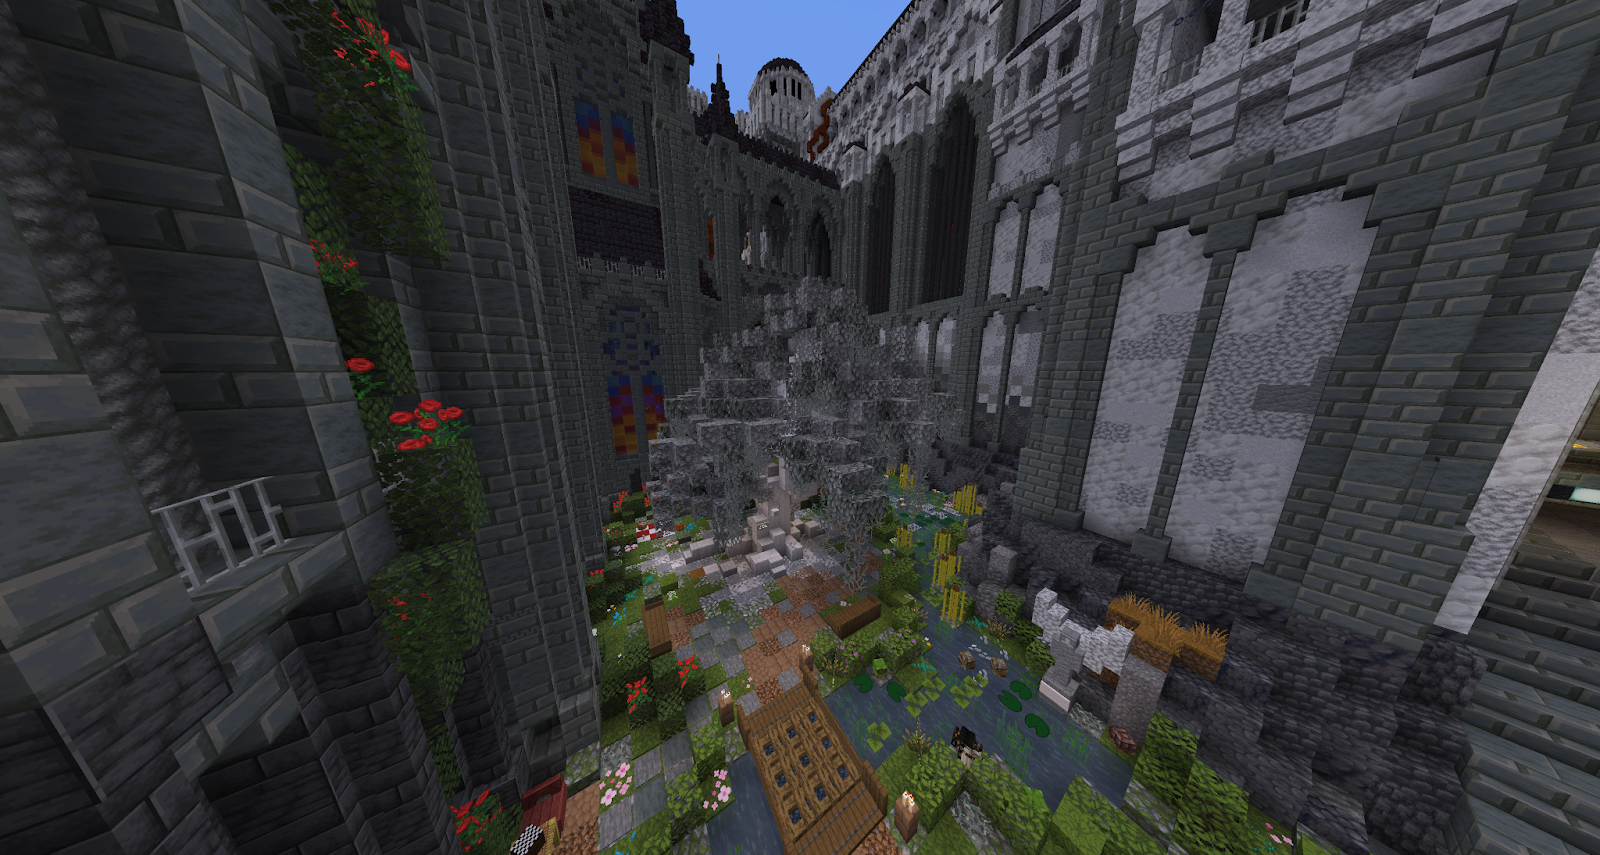
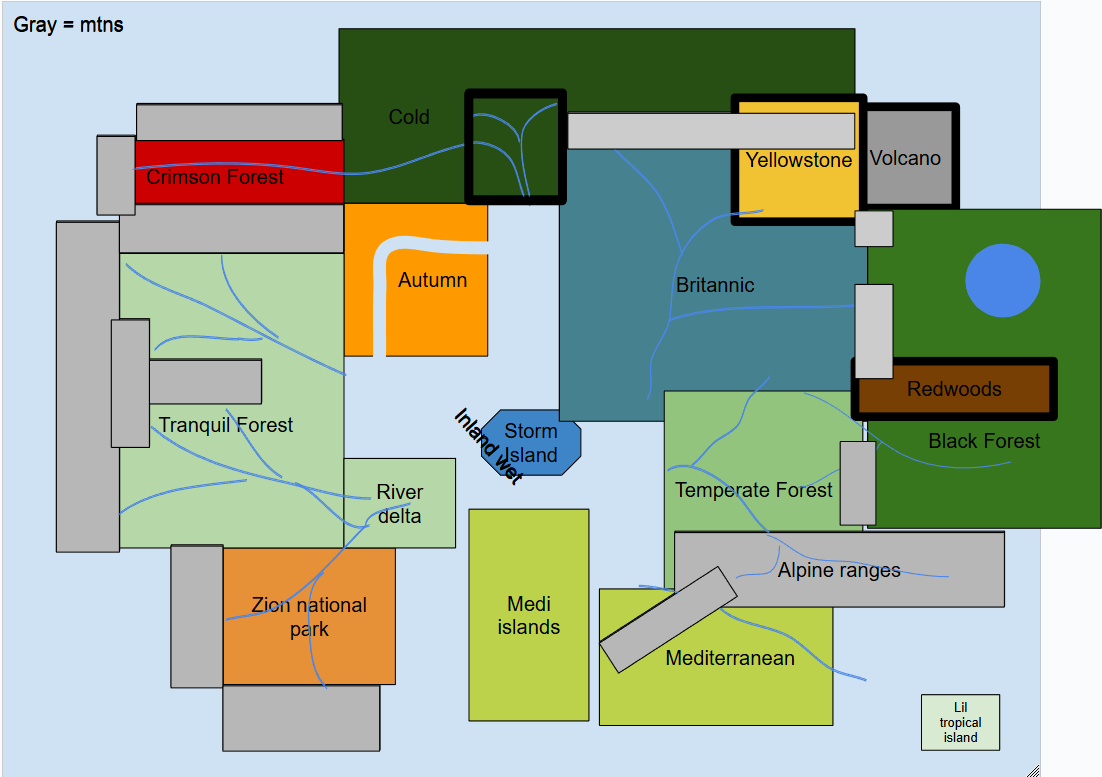
The Overall Map
Here is the final map that we pushed to be world-painted– you’ll notice there are some important differences to explain.
- The temperate biome was used as a generic fill biome, but since there was nothing different about it from the western/tranquil plains area. We were also concerned that all the fantasy biomes were too concentrated in the west and so added the goldleaf biome on the inland coast and the rest turned into the southern black forest.
- The Silverwoods was also added with the same idea that if some folk wanted to settle in the fantastical biomes, we should provide more variety and make them desirable to build in.
Technical Details
I cannot continue without granting significant credit to our world-painter @River who was the one who brought these commands to us and demonstrated them in the first place. Without him this map would not look the way it does and all of us would have been mucking about with only basic noise patterns and voxel to light our way.
The map design process this time was somewhat unique compared to other map development processes. After the theory-crafting stages of the map was complete and we began painting the map, the only things we included in the paint itself was the actual terrains shape, the trees, and different sloped block-palettes, for mountains or plateaus faces. After the paint was exported from World-painter and uploaded to the map, the entire map was basically sandy beaches/ocean, the higher-sloped stone terrain, the trees and grass blocks. The majority of the map at this point was pretty much entirely barren grass blocks or green wool and that was intentional for our next steps.
As you’ve seen, our map utilizes custom biomes with custom name spaces, and were meticulously painted because we would use a global mask, and apply all of our biome/specific palettes across entire biomes one biome at a time. Making sure to only affect the specific biome we’re working on, applying our custom, per biome ground palettes, foliage palettes, or any other unique terrain or aesthetics without affecting other biomes. Allowing us to utilize FAWE and Arceon’s more advanced terraforming commands to produce the biomes you see today.
Another key detail we focused on was ensuring block palettes at different slopes were adhered to. Blocks set at or above a 55 degree angle would be brushed as a stone palette using whatever the biomes stone palette was. Blocks below that would be the main grassy ground palette you see. This allows for more realistic erosion lines and rock faces scattered across the map, small or large. This also helps easily distinguish more flatter surfaces which helps draw players to where the walkable terrain is or avoid steeper terrain. This would be accomplished first, by turning entire areas to one placeholder wool, then masking it, and running //replace /55d:89d <insert specific stone palette> and //replace /0d:55d <insert ground palette>. You can also tell that just about every biome has a primary and secondary stone palette, where one accents the other. We used the slope command to add this accent by running the same command above but from 60d:65d, which we found to be a good angle and ratio to accent the rest of the stone.
Mask Commands
Here is a link to some worldedit documentation on masks. These mask commands were crucial to essentially every function of making the map, to the point where I can’t even explain it all without making this post impossibly long.
https://worldedit.enginehub.org/en/latest/usage/general/masks/#offset-mask
Pattern Commands
Below is a simplex pattern, this was created using //set #simplex[7][red,blue,yellow]. What this does is mathematically provide a pattern based on the input size, blocks and the percentage of each block (without a % its equally split). This pattern is also consistent even when redoing it, the same command will always provide the exact same block in the exact same position.
Simplex patterns are the most used pattern on Azuras as every single biome uses at least one.
Less commonly used but very important is the #arcvoronoi pattern, which provides this sort of web-like or tectonic-plate-like pattern. You see these especially in the volcano biome and in floating ice chunks on the northern coasts and lakes.
Layering commands
Below you can easily see an example of how we layered different commands to produce the terrain you see below. Starting with the previously mentioned #arcvoronoi from Arceon to apply the cracked-earth palette, then replacing the placeholder material we used for the actual non-crack portion of the ice image below with another #simplex pattern of various ice blocks and snow blocks. This is just one example of many parts of the map where we layered multiple different brush patterns on top of one another and selectively affected different areas exactly the way we wanted to. Often running and layering 20 or so commands on top of one another in each biome to produce the exact aesthetic we wanted to achieve. This technique was used heavily when it came to applying foliage across the biomes, from the small patches of similar flowers, to different foliage over different ground palettes in biomes, differing palettes from more forested areas to more plains areas etc.
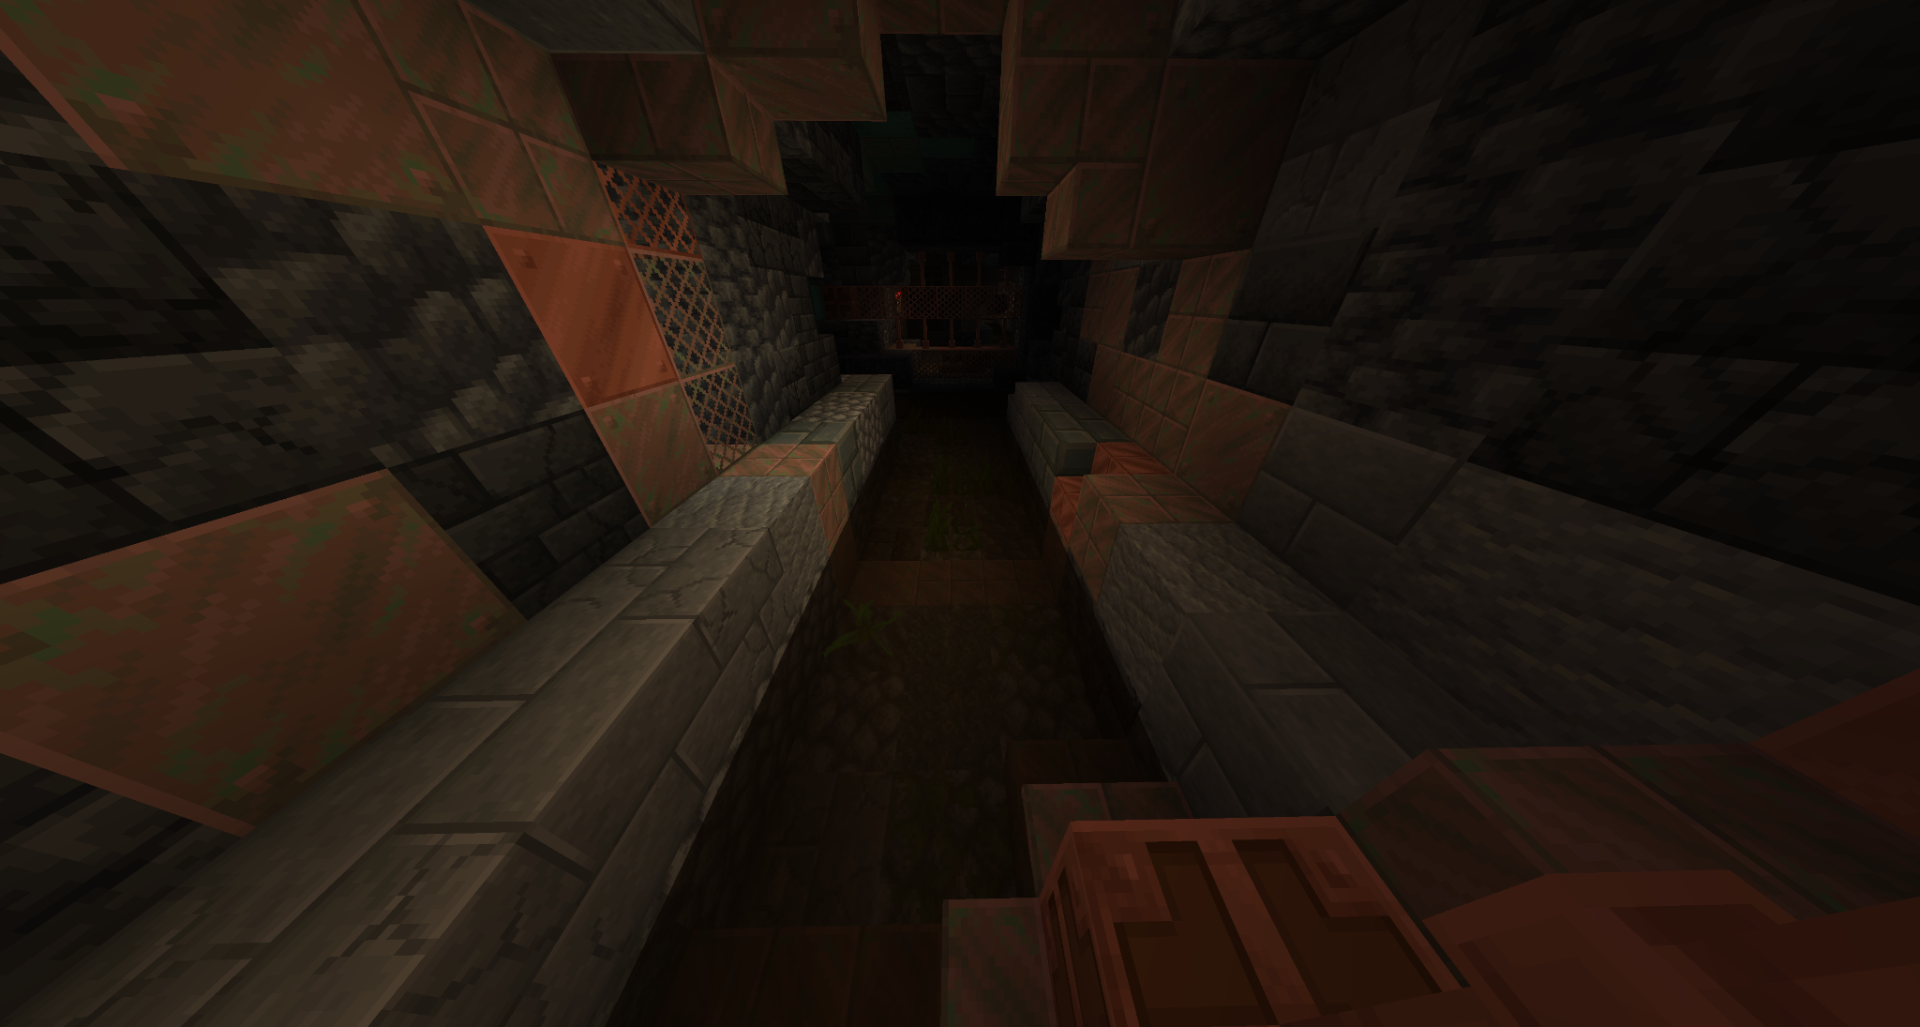
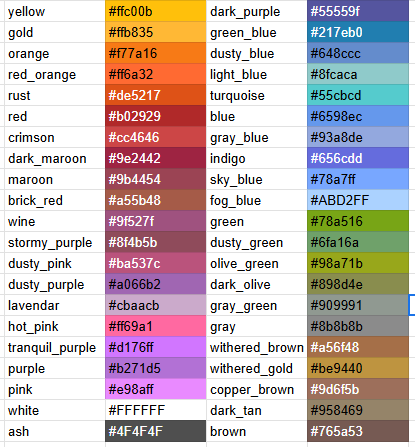
Custom Biomes
Our custom biome datapack made easily editable by @Crunchiest_Leaf is one of the key technical evolutions that let us make the map as it stands. The way it works is that certain blocks are actually greyscale by default, and minecraft imposes a color value onto these blocks dependent on the biome. What our datapack does is input our own chosen colors onto our own custom written biome names, letting us change biome colors without even using a texture pack. These blocks are regular vines, oak, dark oak, acacia, jungle, and mangrove leaves that use the foliage_color value, grass blocks, short grass, ferns, bush, sugar cane etc. use the grass_color value, leaf litter uses a separate dry_foliage_color value, and finally the water, water_fog, sky, and fog values are also customizable. Below are images of a few examples plus an excerpt from the excel sheet tracking all our color values.
Biomes with pattern commands! We can also use the #simplex patterns to create multi-colored biomes, while this effect is a bit odd with grass color shifts, it has obviously done wonders in the tree leaves, letting us make the eternal autumn biome as well as the goofy tests you can see below.
Tree Roots
This one is quite simple, using the replace adjacent commands string several times to make sure that any grass (or ground-palette) block touching wood blocks is replaced with muddy mangrove roots, another command is run replacing the ground touching those muddy roots with podzol, and another for that ring of podzol as well. Other patterns are sometimes layered into this in some biomes.
Swamp-Tech
Here we have another example of layering commands to make swamp terrain very quickly. First you make a pattern like this, using #simplex[7][red,blue,yellow] for example.
Then you change one of those colors to water. (at this point the red is redundant but it was necessary to get a pattern like this without TOO many holes).
Afterwards you gmask your land, and use angle replaced commands to target the blocks by the elevation change near the water on land, but also the edge of the pond under water (the important bit for the next step!)
Now you can replace this yellow portion with water, and thus deepening the pool while keeping the pink portions that graduate the slope! You can then replace the wool with your ground palette and voila!
Arceon Commands
Below are sections detailing how we used arceon to shape terrain, and this video shows how to use all the commands. https://youtu.be/HyTARJEMZYU?si=sRhVcdmFHNagS507
Smoothsnow
Here is a showcase of how the snow for the Boreal biome was done. Having a lot of flat land, the smoothsnow effects felt too geometrically smooth, and so a #fractal pattern was used to break up the terrain, before running //smoothsnow 3 blue -o twice to get the effect you see on main.
Terragen
These commands were used extensively, and with painful slowness (the command takes a lot of resources and is slow) to create the shoreline rocks you see in the Black Forest, Storm Island and Autumn Island biomes, and also the basalt pillars you see in the Highlands. I’ve linked a video that explains all the patterns and how to use the commands, in our case we used the manhattan pattern for the highlands, and a combination of several for the other shore rocks.
Rivers
By far the most painful stage of development, as while the river commands shown in the linked video helped cut down a massive amount of time, a lot of hours were spent with voxel carefully crafting the riverbanks as best that can be done, and even more time shaping the terrain to make the rivers flow realistically, as this was not able to be done in the world paint prior.
Thank you all for reading if you did, I hope that this helped you understand why and how this map turned out the way it did. Of course there is a lot more to mention than I can reasonably detail in this post without it being too much to digest. Feel free to comment below with any questions, feedback, or well-thought out ideas.
I am working on rolling out training for these methods, so be on the look out for that if you're a builder.